Author

Mama Blair

in Toddler Life

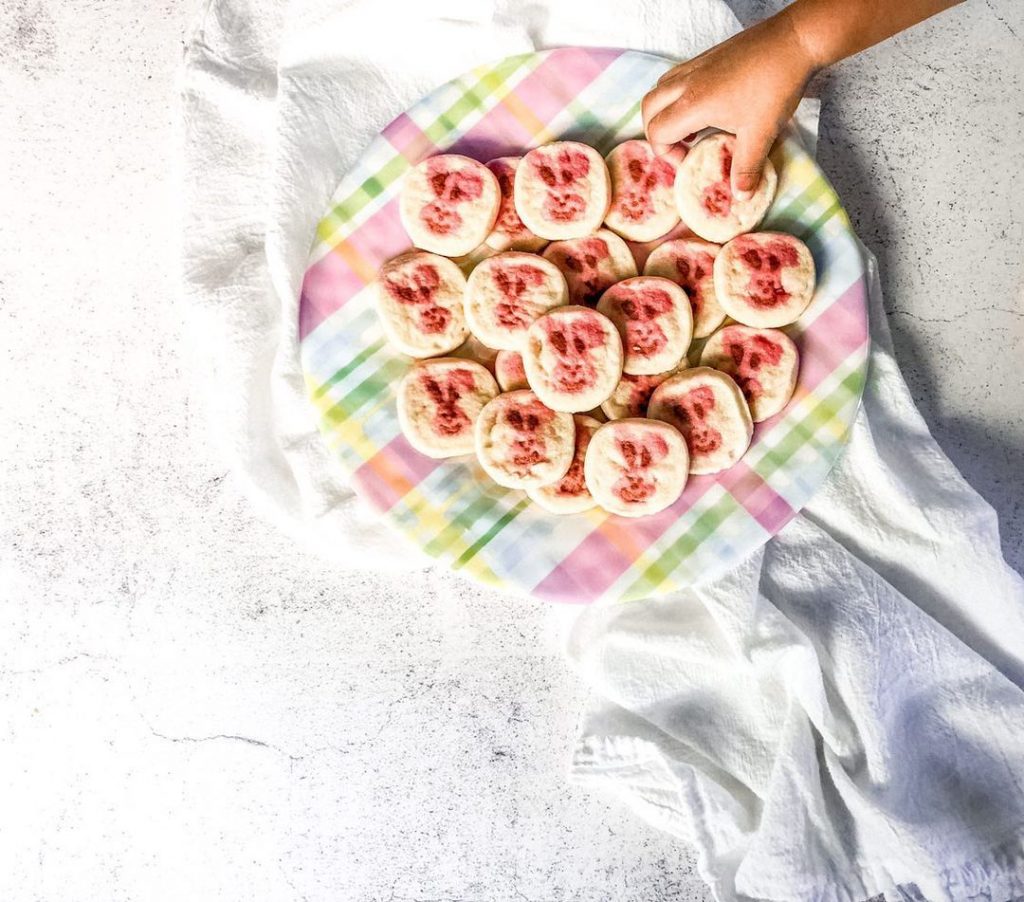
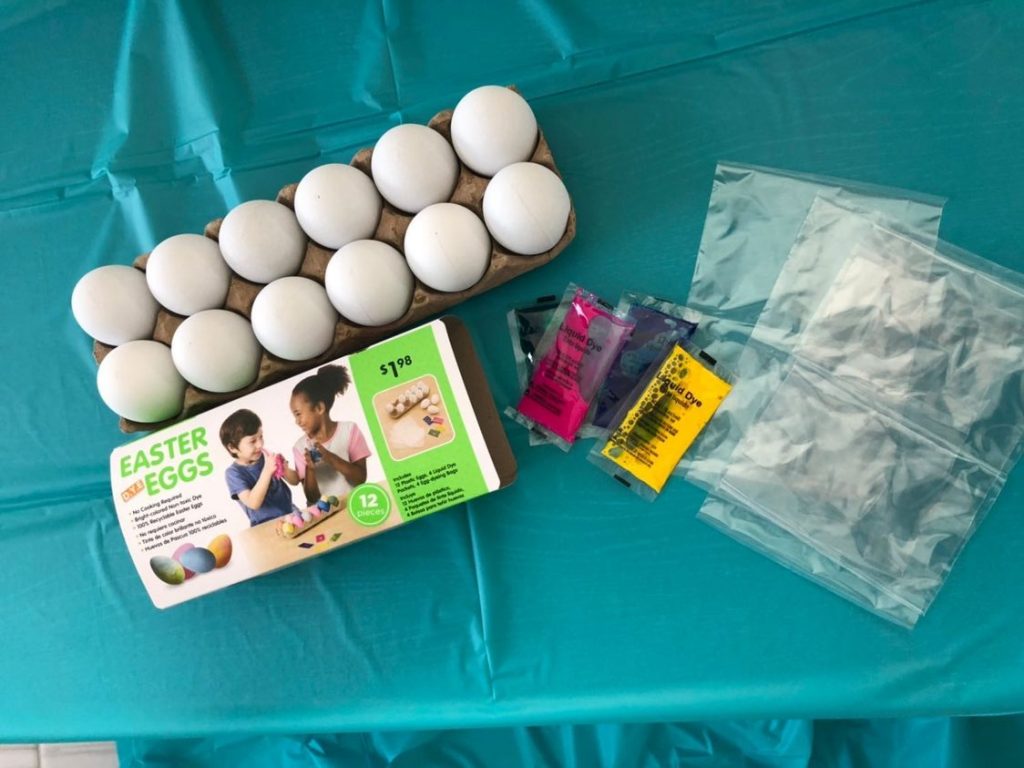
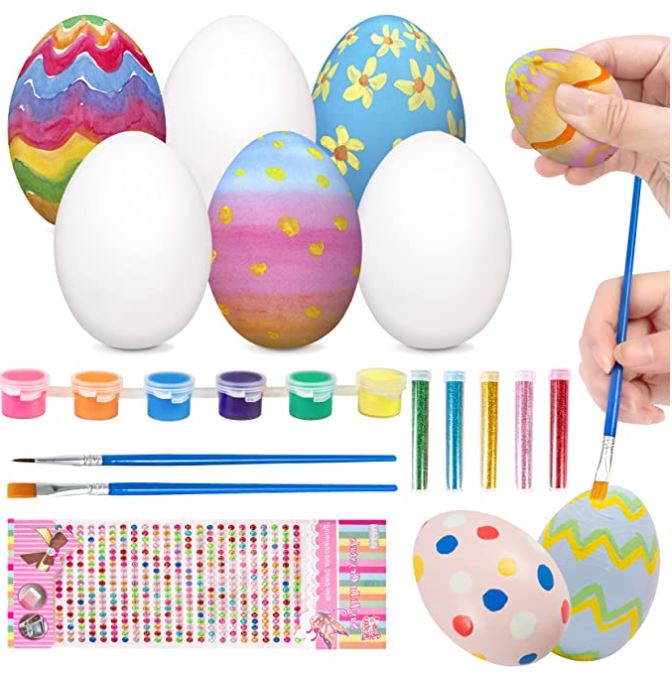
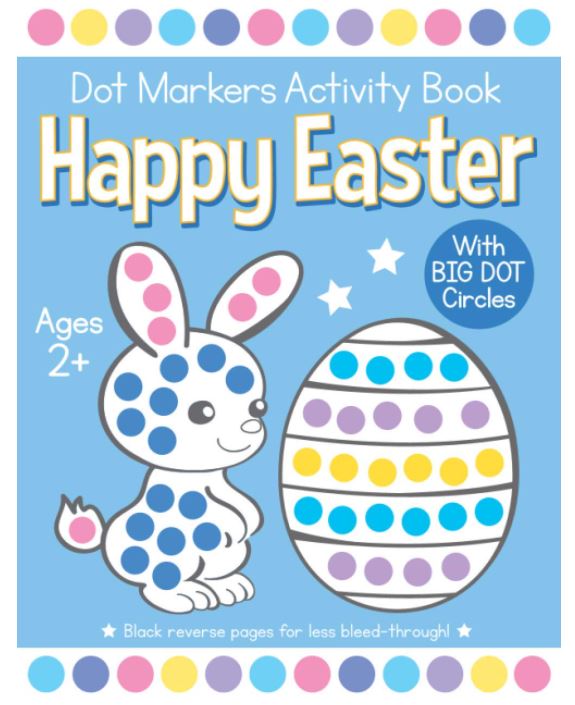
Easter Activities for Toddlers

This is Trent’s second Easter and since he’s two years old I wanted to have some things around the house for us to do for the holiday. At this age kid’s love hands on activities that incorporate colors, being messy, and the outdoors. My goal was to incorporate a little bit of everything and he loved it all! I’ve listed the different things we did below along with links to the products. Hope your little ones enjoy these fun moments and I can’t wait to try something different next year!

EASTER ACTIVITIES FOR KIDS!!

Bake Easter Cookies

I bought the Pillsbury peel and bake bunny cookies because it’s quick and easy! Another option is to buy Easter cookie cutters to make sugar cookies and let your kid decorate them with sugar/icing. When you’re done you can put them on a cute Spring plate or bowl…or in little festive baggies!

Paint Eggs

I found some fake eggs and dye at Wal-mart and I liked that they were mess free. You place an egg inside a small bag and add your desired color and move the egg around until it’s fully painted. This is supposed to be a mess free activity but with kids…no such thing. This concept was too advanced for Trent so I put all the dye in small cups and he loved being able to dip the paint brush and paint all the eggs. If you don’t want to buy fake eggs, you can boil eggs and paint them with whatever paint you have in the house. Once they’re all done, display your kid’s work in a cute bowl or easter basket with colored grass!

(Click here to purchase)

Dot Markers

This Easter coloring book is from Amazon and there’s a lot of different pictures/pages inside. I call these markers bingo markers and it took Trent no time to grasp the idea of filling up all the circles. You can also keep these markers and pages in your diaper bag when you need to keep your children busy at a restaurant.

(Click here to purchase)

Egg Chalk

Kid’s love chalk and frankly, so do I. The only thing with it being egg shaped is it rolls so easily down our slanted driveway lol. The different colors are great for young ones to use their imagination and draw a million squiggly lines. Of course the more your draw the less like an egg it becomes, but all in all it’s still an awesome outdoor activity with a sprinkle of holiday spirit!

(Click here to purchase)

“I am a participant in the Amazon Services LLC Associates Program, an affiliate advertising program designed to provide a means for sites to earn advertising fees by advertising and linking to amazon.com.”  

in Baby Life, Toddler Life

How to Plan a Kid’s Halloween Party

Since COVID arrived, less families participate in trick or treating..which is understandable. 2020 was my first year as a parent and I didn’t want the year to go by without celebrating this spooky holiday! So I decided to have a Halloween party that my friends could safely enjoy with their kids and babies. Below are the super easy and affordable games I created along with snacks that all the adults and kids enjoyed!

Affordable & Easy Halloween Crafts for Kids / Babies

When it comes to throwing parties for kids, it’s best to have things for all ages to enjoy. I always make sure to have a mixture of crafts and games set-up throughout the house. 

When it comes to parties, I love to find ways to save money. I knew there were going to be a few babies at the party so I wanted to have a sensory game they could enjoy as well.

DIY WITCH POTION

What You Need: 

  • witch potion kit (click pictures for Amazon link)
  • assorted glitter
  • assorted food color
  • stir sticks, I used cake pop sticks
  • empty 2 oz cups
  • funnel, water

*I created an instruction sheet that mentions to pour water in a clear cup, add glitter, food color, and use a funnel to pour your potion into a bottle. Then you decorate your bottle with a sticker and charm! Although this was a blast, it was very messy. Adult supervision is required since children tend to over pour, spill things, and some of the GLASS potion bottles ended up breaking.  

Purpose: For children to create a secret witch potion and decorate the bottle with a spooky accessories. 

PUMPKIN PAINTING

What You Need: 

  • plain white pumpkins
  • paint brushes
  • assorted paint
  • cups of water

Purpose: For kids to let their creativity flow and decorate a pumpkin with paint

FACE PAINTING

What You Need: 

  • face mask stencils
  • paint brushes
  • cups of water
  • mirror
  • wipes or makeup remover wipes

Purpose: For adults to use the stencils and paint to create a design on their child’s face

What You Need: 

  • candy corn sticket kit (click picture for Amazon link)
  • assorted stickers
  • assorted rhinestones

Purpose: For toddlers to decorate their favorite candy corn monster

What You Need: 

  • foam monster kit (click picture for Amazon link)
  • glue stick
  • googly eyes
  •  

Purpose: For toddlers to decorate their favorite foam monster face.

Affordable Halloween Games for Babies and Toddlers

PAINT IN A BAG (SENSORY GAME)

What You Need: 

  • 2 ziploc bags
  • painters tape
  • different color paint bottles

*Carefully squeeze large amounts of paint into a ziploc bag. Seal the bag shut. Place the bag on a tile/hardwood floor and secure the outside edges with tape. 

Purpose: For babies to use their fingers to paint mess free.

MONSTER GOOGLY EYES (SENSORY BAG) 

What You Need: 

  • ziploc bags
  • different monsters printed on a paper
  • googly eyes
  • hair gel (any color)
  • painters tape

*Tape down printed monster paper on a table or floor. Place googly eyes and squeeze hair gel inside ziploc bag. Close bag and make sure there’s no air bubbles. Tape down bag over the monster paper. 

Purpose: To move the eyes onto the different monsters. (mess free)

PUMPKIN TIC-TAC-TOE

What You Need: 

  • 10 small pumpkins, two different colors
  • a string a rope
  • tape

*Create a 9 square grid with your string and tape down on a table. 

Purpose: 2 player game to play tic-tac-toe with pumpkins to get 3 in a row.

PAPER PLATE PUPPETS

What You Need: 

  • paper plates, popsicle sticks
  • assorted washable paint colors
  • paint brushes, markers
  • cup with clean water
  • assorted construction paper
  • safety scissors, glue/glue sticks

Purpose: For kids to create halloween inspired characters on a paper plate so they can wear it as a mask. 

COOKIE DECORATING 

What You Need:

  • paper plates
  • plastic knives
  • assorted sprinkles
  • sugar cookies
  • assorted cookie icing flavors
  • seran wrap

Purpose: for kids to decorate their own cookies. If you make plates ahead of time this will reduce the mess of sprinkles everywhere and it’s more sanitary for everyone to have their own set of sprinkles.

PUMPKIN BEAN BAG TOSS

((Note: the game pictured was purchased from the link at end of page. Below is how you can make your own))

What You Need:

  • 6 empty cans
  • 3 bean bags, or balls
  • halloween decorated paper
  • tape

*wrap paper around the cans and use tape to secure it

Purpose: to stand back and try to knock down the cans 

PUMPKIN MEMORY GAME

What You Need:

If using printer: create 12 large pumpkins with 6 different jack-o-lantern faces on MS word, print on card stock paper and cut it out. 

If using paper plates: paint plates orange and wait for paint to dry. Draw jack-o-lantern faces with a sharpie. Glue pieces of green construction paper on top of the plate.

Purpose: To flip over pumpkins to get two of a kind.

RING TOSS

What You Need: 

  • small cones
  • 2 rings

Purpose: To stand back and toss rings onto the cones

PUMPKIN GOLF

What You Need

  • 1 large pumpkin, knife
  • kids golf club, balls

*Remove inside of pumpkin. Carve out eyes and a large mouth that the balls can fit into.

Purpose: To try to make it into the Jack-o-lanterns mouth with the golf balls.

Party Snacks for Kids & Adults

Food is one of the most important things for a party! Below are the yummy treats I served!

  • White chocolate covered pretzels (used orange food coloring and green m&ms)
  • Cinnamon sugar bats (used tortillas and baked them in the oven)
  • Frankenstein cups (used vanilla pudding cups, green food coloring, and crushed oreo cookies)
  • Mandarin orange cups (hot glue green pipe cleaner for the stem)
  • Ghost suckers (covered tootsie pops with a napkin)
  • Nuggets, chicken flautas, pizza bites, ham/turkey sliders
  • Baby apple sauce packets & crackers

Must Have Party Supplies!

“I am a participant in the Amazon Services LLC Associates Program, an affiliate advertising program designed to provide a means for sites to earn advertising fees by advertising and linking to amazon.com.”  

in Sweet Tooth

Blackberry Peach Crisp

I just found out that July – September is peach season! My local grocery store had the most perfect large peaches at the beginning of September and I finally gave in and bought a bag lol.

Lately on Instagram people have been posting a healthy peach crisp recipe that makes 1 serving and you stick in the air fryer. So that gave me the idea to make a bigger and even better version. 😈

I started browsing through Pinterest so I can get some ideas on what measurements and ingredients to use and then I freestyled a little and added my own twist. BLACKBERRIES! Since blackberries are too pricey for my pockets, I bought them frozen and they worked perfectly! Since the peaches were nice and ripened the blackberries and lemon juice helped balance out the sweetness. ((I think next time I might add a little more berries and lemon juice)) 

Not to brag but I think this recipe is damn near perfect haha. And it can be made in so many different ways. I’ve already decided that I’ll make this for Thanksgiving and use apples and cranberries! 🤤🤤

I hope you all give it a try and let me know if you did anything different. 💚

HELPFUL PRODUCTS TO MAKE THIS RECIPE:

“I am a participant in the Amazon Services LLC Associates Program, an affiliate advertising program designed to provide a means for sites to earn advertising fees by advertising and linking to amazon.com.”  

in Baby Life, Preg Life

Post-Partum Bathroom Routine

One of the biggest changes in post-partum is your daily routine when you go to the restroom. A typically 2 minute potty break will turn into 5-10 minutes. I wasn’t aware of how different things would be for me, so I wanted to share some things that help me heal from having a natural child birth. Just remember to be patient with yourself and understand that this is all a part of the healing process and every new mom experiences the same thing. 😊

Main Essentials

**It’s beneficial to set up a small table by your toilet at home or you can put these items nearby on the counter**

  • peri bottle (Use this to gently squirt warm water down there to clean the area instead of using a million toilet tissues)
  • extra heavy pads (do not use tampons!)
  • disposable underwear (it’s easier to throw away blood stained underwear instead of messing up your own. Recommend mesh underwear for c-section scars since the fabric is looser)
  • ice maxi pads (helps soothe
  • sitz bath (you can soak in the toilet seat bath to reduce inflammation and relieve pain)
  • witch hazel (helps soothe the soreness)
  • frida tablets (drop these in the sitz bath for additional relief)
  • hemorrhoid wipes/pads (use as directed if you have hemorrhoids)

Since your vagina and bottom will be really sore and feel swollen after a natural birth, you can make these padsicles ahead of time to help soothe the area. 


What you need:

Always overnight pads, Witch hazel, Aloe Vera 100% gel, Lavender essential oil

Steps:

  1. Partially unwrap a few pads at a time, but don’t detach the wrapper. Spread aloe vera generously up and down the whole pad. Don’t just do the middle part, spread it further down almost to the bottom of the pad. Just trust me on that.
  2. Pour about a teaspoon of witch hazel down the middle.
  3. Add a few drops of lavender oil. Fold the pads back up to how they were and stick them in a gallon sized plastic bag, then freeze.
  4. Pull them out of the freezer, one by one, as needed and let them thaw for two or three minutes before use.

**Instructions and pictures provided by: PrettyProvidence

Restroom Life at Home Continued..

For the first couple of weeks you will not be able to control your bladder. A little pee may come out if you laugh too hard or it may come while you’re rushing to the restroom. I really don’t know why that is, but it happened to me and my friends. Buttt you’ll be okay since you’ll still have on the thick pads and disposable underwear lol. 😉


Your lower body is still going to be sore in the first couple of weeks. So don’t be hard on yourself if it takes you longer to sit down on the toilet or get out of the shower.

Start to monitor how often you poop. If it’s been a couple days and you can’t go, you can buy stool softener or try eating foods that’ll make you have a bowel movement. And of course contact your doctor if you think your constipation is an issue.

Blood Discharge

It’s best to continue to use the peri bottle when you go to the restroom until the bleeding stops. If you have stitches down there, be sure to pat dry the area so you don’t risk tearing a stitch.

It’s important to watch how much blood discharge you have. The more active you are, the more you’ll bleed. Try to stay off your feet and minimize doing house hold chores / bending down for the first month.

I think my heavy bleeding lasted about two weeks and then I switched to regular pads and underwear. Blood clots the size of a quarter are normal. If you get blood clots larger than a plum, call your doctor immediately!

Patience is Key

You should know that this process isn’t easy for anyone and everyone’s healing time will vary. Planning ahead will take away any added stress and it’ll help your time in the restroom become manageable. Please remember to be patient with yourself take it day by day and THERE IS light at the end of the tunnel.

“I am a participant in the Amazon Services LLC Associates Program, an affiliate advertising program designed to provide a means for sites to earn advertising fees by advertising and linking to amazon.com.”  

in Lunch / Dinner Recipes

Chicken Lettuce Wraps

I can’t remember how old I was when I first tried lettuce wraps, but I know it was P.F. Changs and they were amazinggg! 

I rarely go there so I knew I needed to find a recipe that was good enough to satisfy my craving. Pinterest came to the rescue once again and after a few of my personal tweaks I created perfect lettuce wraps!! 

I typically use ice berg lettuce for mine since I love the crunch. I tried butter lettuce once but the lettuce leaves are too thin and flimsy for my preference. Making/eating lettuce wraps is a form of art lol. I like to take a piece of lettuce, add a little bit of steamed rice, pour the chicken mixture on top, drizzle with sriracha, top with chow mein noodles for an added crunch. And man I tell you what it’s sooo good!! 🤤

I hope you enjoy this recipe and let me know if there’s a topping that you like to eat with yours! 💚

HELPFUL PRODUCTS TO MAKE THIS RECIPE:

“I am a participant in the Amazon Services LLC Associates Program, an affiliate advertising program designed to provide a means for sites to earn advertising fees by advertising and linking to amazon.com.”  

in Lunch / Dinner Recipes

Chicken Nuggets

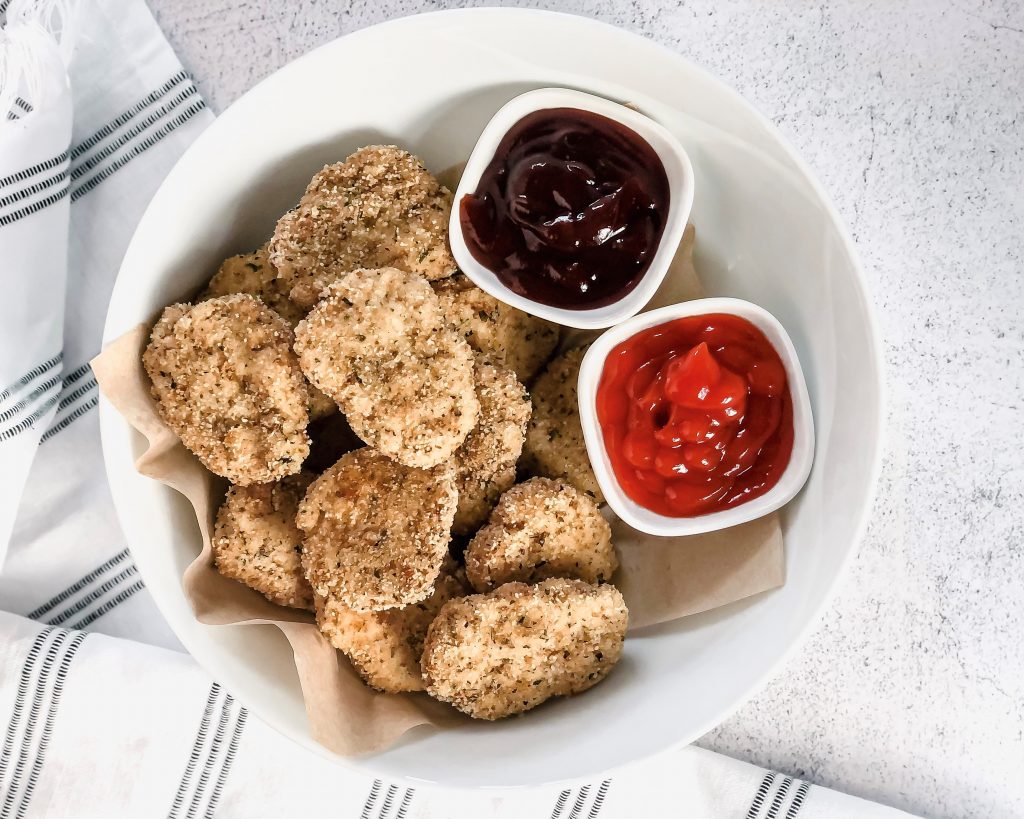
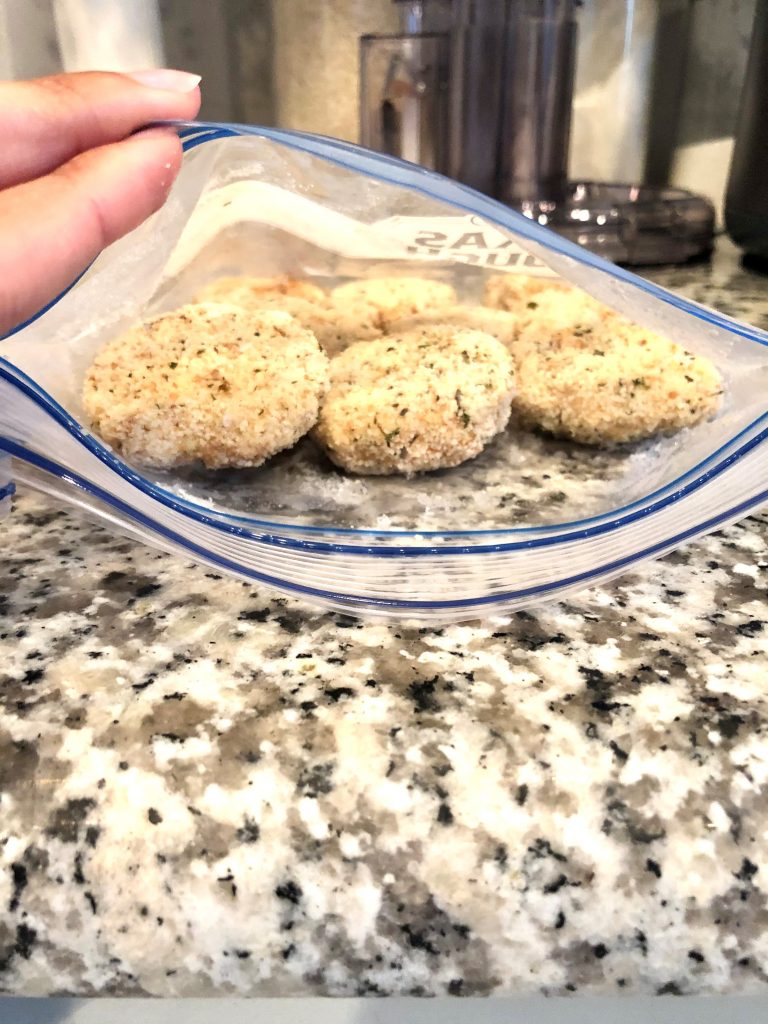
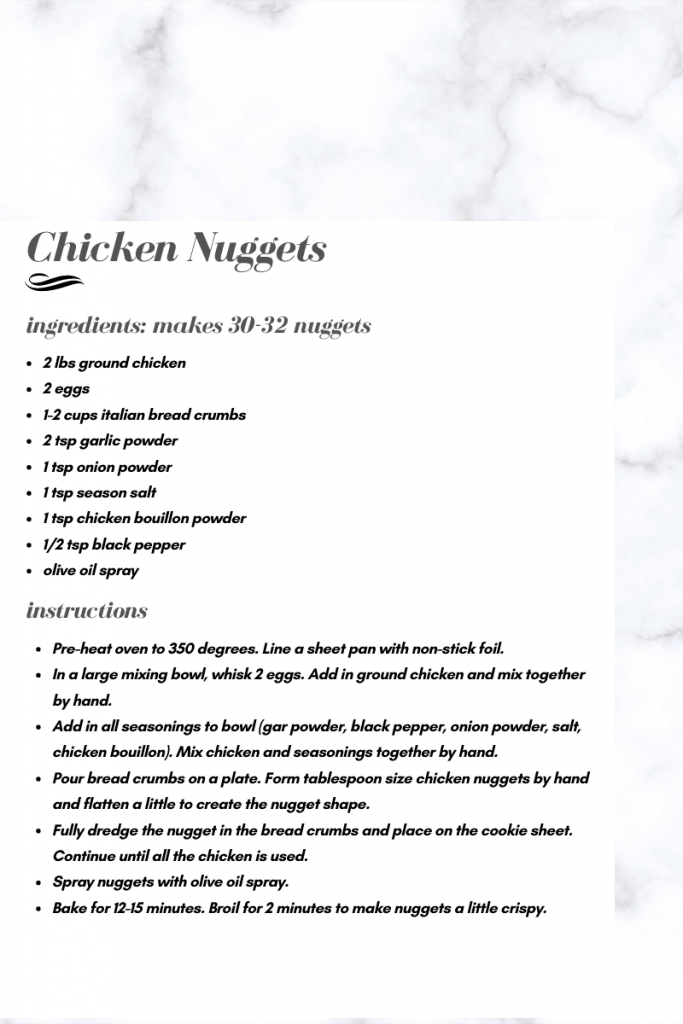
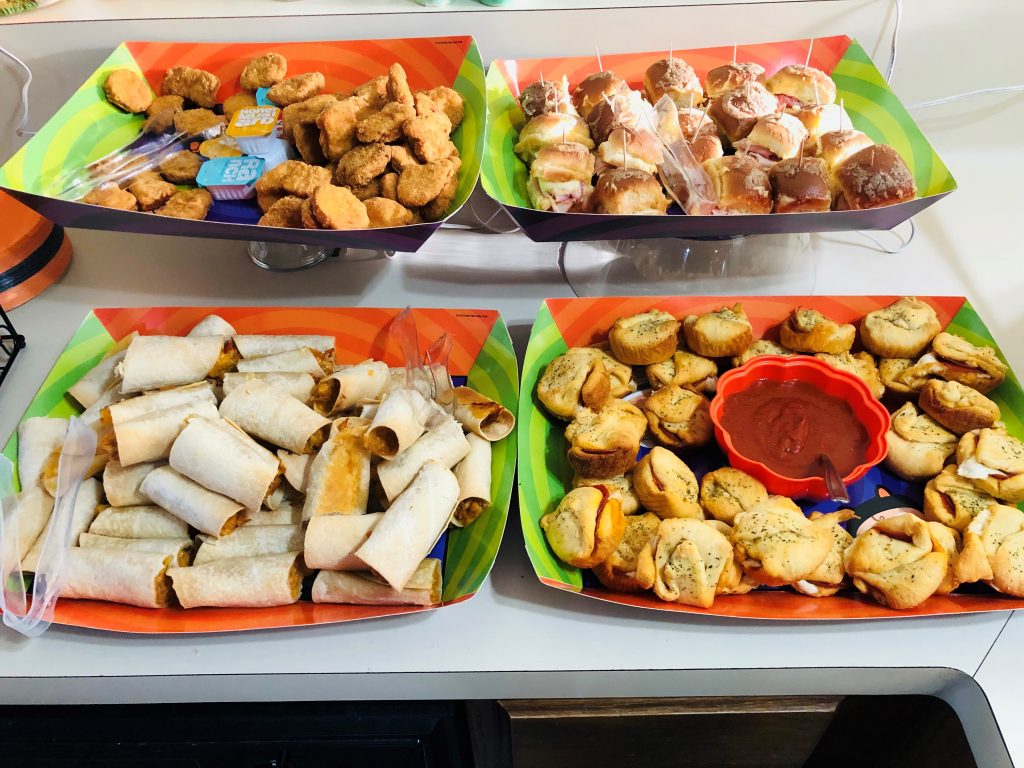
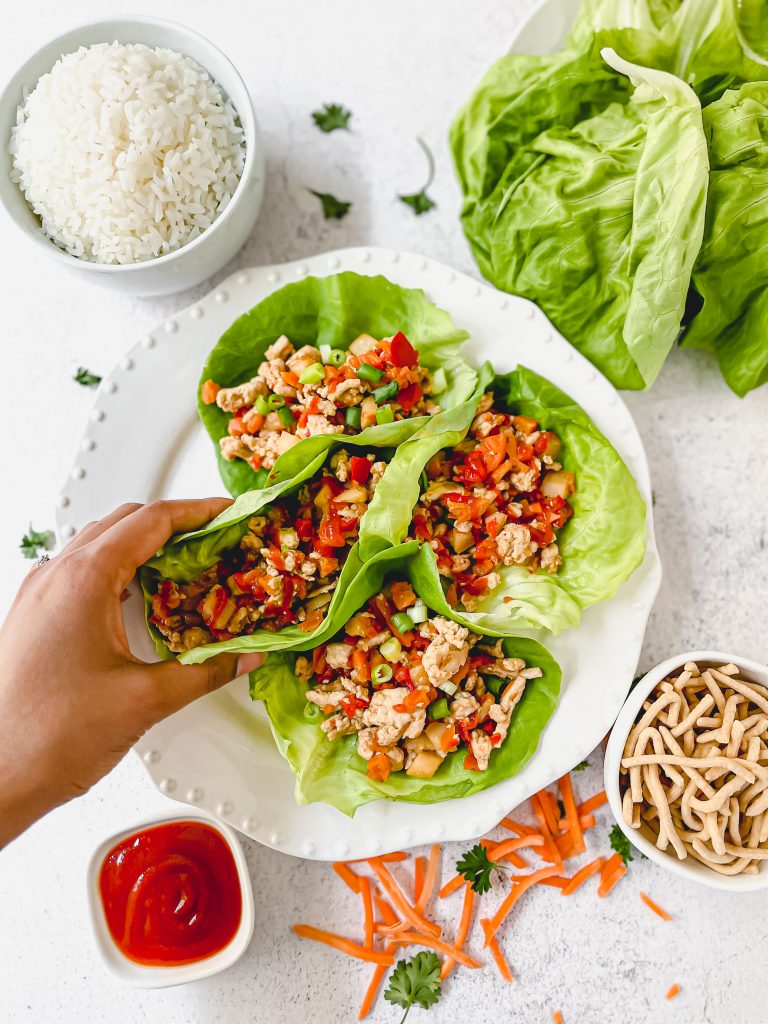
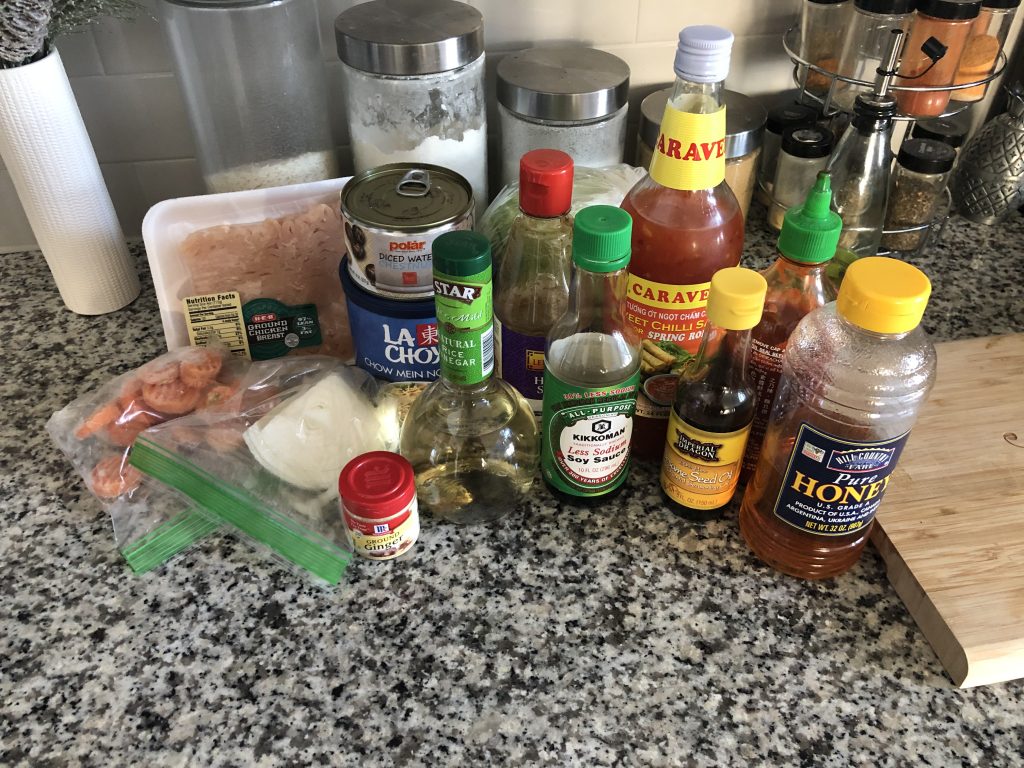
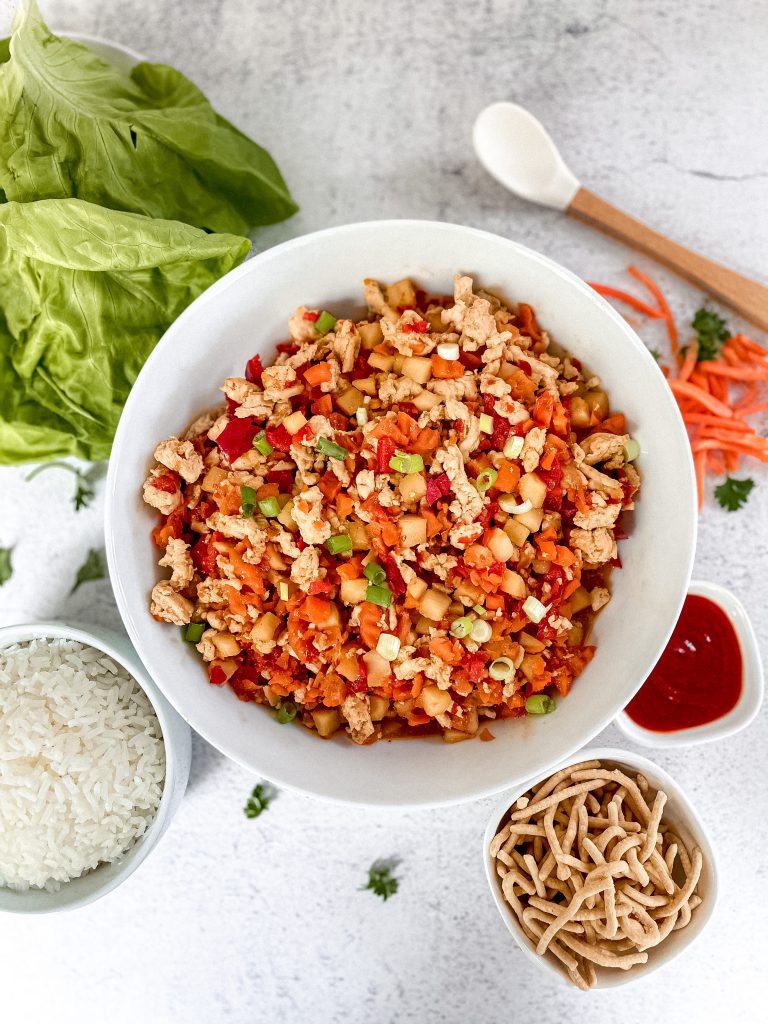
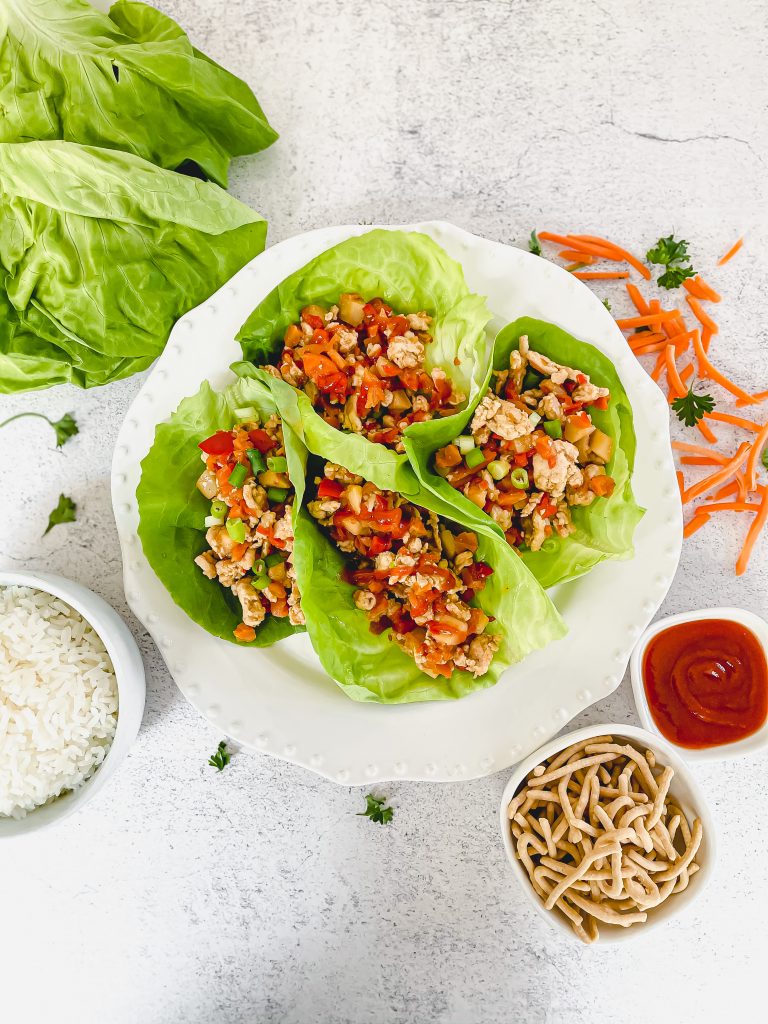
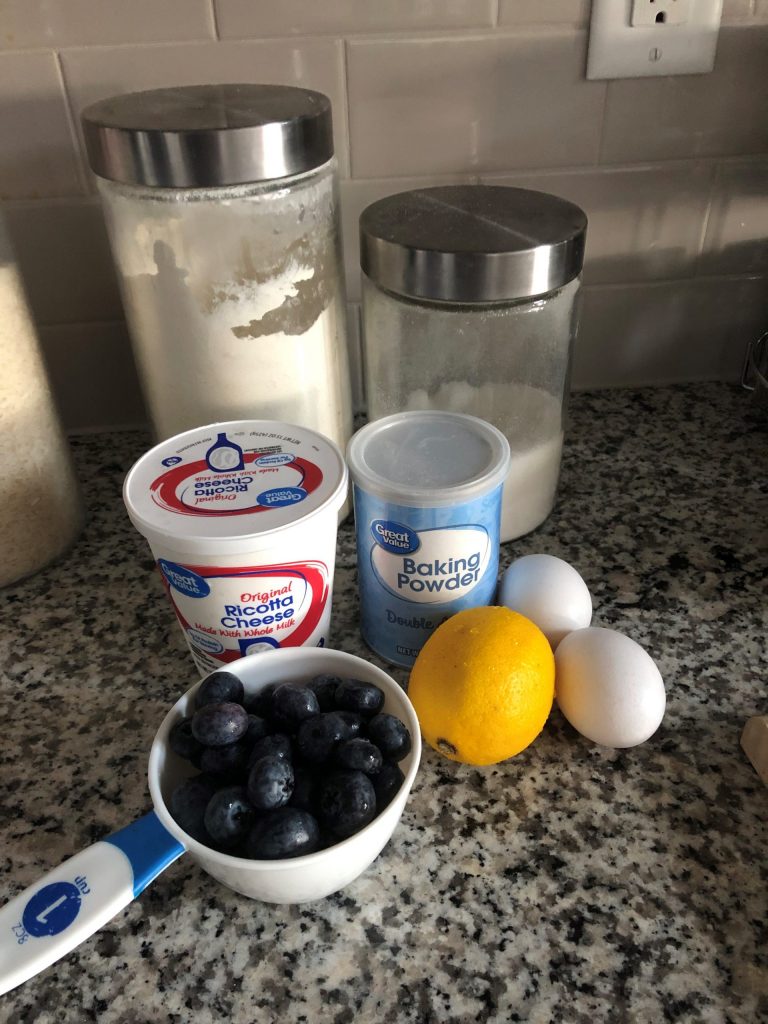
Like most human beings I love chicken nuggets! Normally I’ll buy the bag of frozen kind in the store and eat them for a late night snack. I especially ate them alot when I was preg because I didn’t feel like cooking as much. 

Unfortunately my health conscious husband hatesss when I eat the frozen nuggets so I’m like fine I’ll  make my own! Of course these will taste better if you fry them in grease but I am getting older and need to eat better. So I resulted to baking them, ‘oh joy’ lol. 

If you want to be a super parent, you can even add some blended zucchini or cauliflower to the mix so they can get some veggies in their meal. 😉

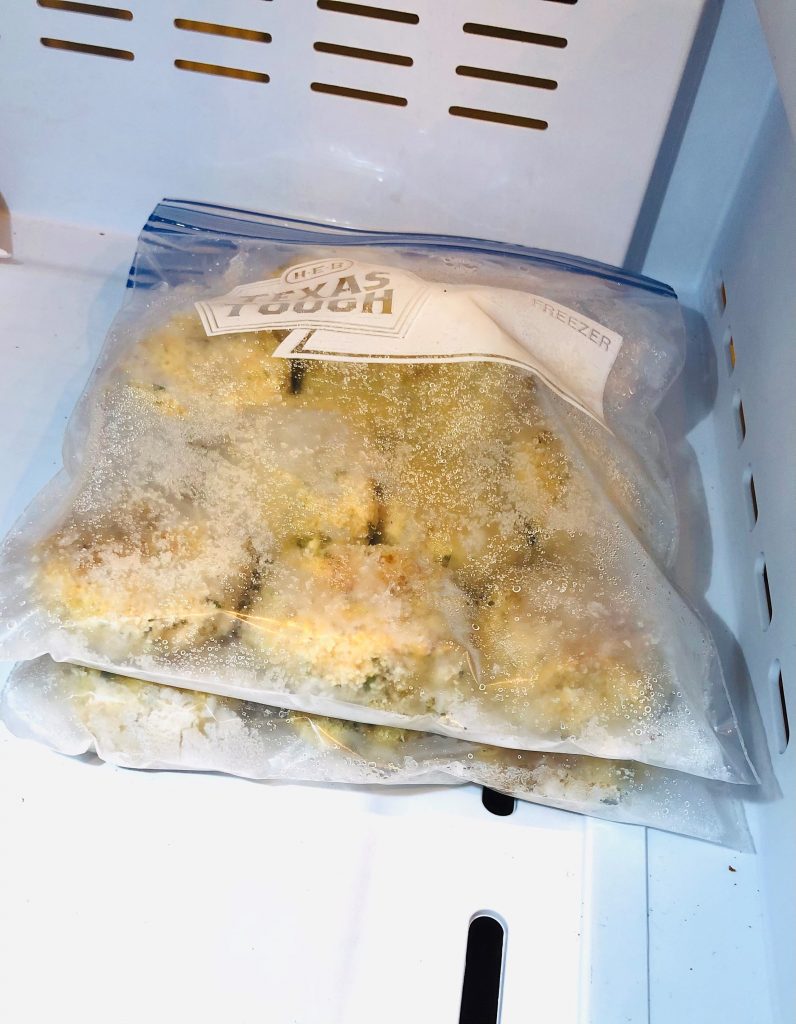
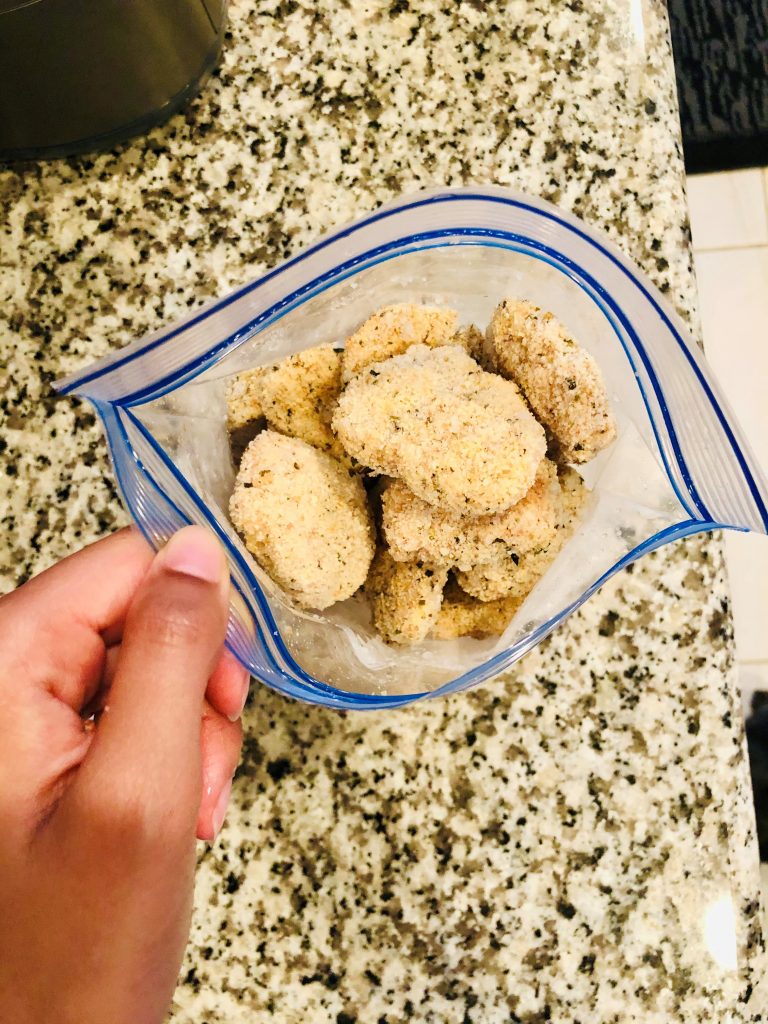
HOW TO FREEZE HOMEMADE CHICKEN NUGGETS

If you have kiddos at home or lovvee nuggets, I suggest doubling up on the recipe so you can freeze the rest. The 2lbs of ground chicken makes 30-32 nuggets and I froze most of mine to eat later. 

  • After they are done cooking in the oven, let them cool on the counter for 15-30mins. 
  • Option 1: Lay them flat inside ziploc bags in one layer and seal tightly. Freeze over night. Next day add nuggets into one bag, reseal, and store in freezer. 
  • Option 2: Lay them flat on a baking sheet with wax paper and freeze over night. Next day add nuggets into a ziploc bag, seal tightly and store in freezer.
  • It’s important to freeze the nuggets in a single layer so they won’t stick together inside the bag. 
  • When you’re ready to eat the again, you can re-heat in the oven, microwave, or air fryer. (Just like you do normal frozen nuggets)

HELPFUL PRODUCTS TO MAKE THIS RECIPE:

“I am a participant in the Amazon Services LLC Associates Program, an affiliate advertising program designed to provide a means for sites to earn advertising fees by advertising and linking to amazon.com.”  

in Lunch / Dinner Recipes

Chicken Fajitas

I absolutely lovveee tacos and fajitas annnd basically any type of Mexican food. One of my fave restaurants to get fajitas from is Papasitos. Their beef is so tender and flavorful and their chicken is super juicy. I knew it was going to be a challenge to recreate their greatness but I stumbled upon a Pinterest recipe that caught my eye. After I added a few tweaks I’m proud to say that this is some good chicken lol. 

I like to use chicken thighs and breasts when I do fajitas just so I can have a good mixture of white and dark meat. The thing that makes this delicious is letting the chicken sit in all of those juices and seasonings for more than 10 hours. You don’t ‘have’ to add extra seasoning like I mention in the recipe…but I think it helps amp of the flavor while you grill it. I hope you guys enjoy this recipe and make yourself a large sloppy taco. 💚

HELPFUL PRODUCTS TO MAKE THIS RECIPE:

“I am a participant in the Amazon Services LLC Associates Program, an affiliate advertising program designed to provide a means for sites to earn advertising fees by advertising and linking to amazon.com.”  

in Lunch / Dinner Recipes

Sloppy Joe Bacon Burger

My mom used to always make sloppy joes for us from the packet mix but it was sooo good. I came across this elevated sloppy joe recipe and just had to give it a try. Annd mann was it delicious! Using cheddar cheese and crispy strips of bacon just makes it so much better. It’s one of those things that you know is unhealthy and greasy but will still devour it anyways because it’ll make your tummy happy lol. I like to pop tater tots in the air fryer to eat with this and sometimes I’ll put it in my sandwich and ooohh weeee! Now that’s what I call mm mm good! Hope you guys enjoy it as much as the hubs and I do! 💚

HELPFUL PRODCUTS TO MAKE THIS RECIPE:

in --

Cauliflower Fajitas

Like most people in the world I lovvve tacos! If tortillas didn’t make me bloated I would def eat tacos every week! 

I saw someone on ig post that they made cauliflower tacos and I just had to give it a try. My husband as increased his daily intake with fruits and veggies so I knew he would be on board with the change. He’s also been cutting back on sodium so I made sure to make a salt free taco seasoning for this dish. 

I’m not a big fan of the ‘cauliflower’ taste but I honestly could not tell it was cauli in my tacos. I meannn I did add cilantro, fresh lime juice, jalepenos, salsa, and a little cheese lol. But still, I couldn’t tell I was eating an all veggie taco. So with that being said…I’ll definitely be making these again for my household and I might make my own salsa next time. Hope you guys enjoy this healthy and vegan take on Taco Tuesday. 💚

HELPFUL PRODUCTS TO MAKE THIS RECIPE:

“I am a participant in the Amazon Services LLC Associates Program, an affiliate advertising program designed to provide a means for sites to earn advertising fees by advertising and linking to amazon.com.”  

in Breakfast Recipes

Lemon Blueberry Ricotta Pancakes

My mother decided to visit me one weekend and I love to cook new food recipes for her to try. 🙂 

I already had some jumbo blueberries in the fridge so I started browsing through Pinterest to get some ideas. 

I finally stumbled upon this pancake recipe that ricotta cheese in it. I’ve honestly only had ricotta in my lasagna but I was willing to experiment. The only thing with ricotta is you have to drain out the extra liquid so it won’t ruin your dish. 

These pancakes were pretty simple to make and after a few ruined pancake flips, I finally figured it all out lol. My blueberries were so big that it made the pancake batter fall apart when I had to flip them. That’s why I added in the step to mush up your berries to make it easier. 

In the end these were very delicious! You can taste a hint of the ricotta but the lemon and blueberry adds such a great flavor and it’ll leave you wanting more! If you give these a try let me know how you like them! 💚

HELPFUL PRODUCTS TO MAKE THIS RECIPE:

“I am a participant in the Amazon Services LLC Associates Program, an affiliate advertising program designed to provide a means for sites to earn advertising fees by advertising and linking to amazon.com.”  

Close